
You have created a blog on WordPress but do not have any posts to show to your target audience. How do you do that? Creating posts on WordPress is a simple thing for most people, but it can prove to be very difficult for beginners. In this tutorial, I am going to discuss a step by step guide on how to create a blog post. I will discuss various aspects of creating a blog post including;
- Creating a New Post
- Creating a title
- Creating post body
- Editing the Permalink of the post
- Adding a featured Image
- Adding an Image inside Post Content using the media library
- Selecting a category
- Previewing A Post
- Publishing a Post
- Saving Post as a draft
- Schedule a Post
- Updating a Post
- Un-publishing and Deleting a Post
In our previous tutorial, we styled the WordPress login page using Custom Login Page Customizer Plugin. I am going to use the same WordPress installation for this tutorial. I am therefore assuming that you have WordPress installed and have selected a theme for use. The first thing to do will be logging into your WordPress admin dashboard. You can do so by visiting your-wordpress-url/wp-admin and then enter your login credentials. This will take you to a page that looks like this;

Creating a New Post
Now that we are at the dashboard, we can start creating a new post. There are three ways through which we can create a post;
At the top of the dashboard window, there is a + New button. If you move your computer’s cursor to point at this button/link, a drop-down menu with Post, Media, Page and User options pops up as shown on the screenshot below. You can click on the Post option which will take you to another screen to create a post.


On the left hand side menu on the dashboard, we have Posts among the menu options. Pointing at this option gives a menu with All Posts, Add New, Categories and Tags options as shown on the screenshot below. Clicking on the Add New option takes you to another screen to create a post.

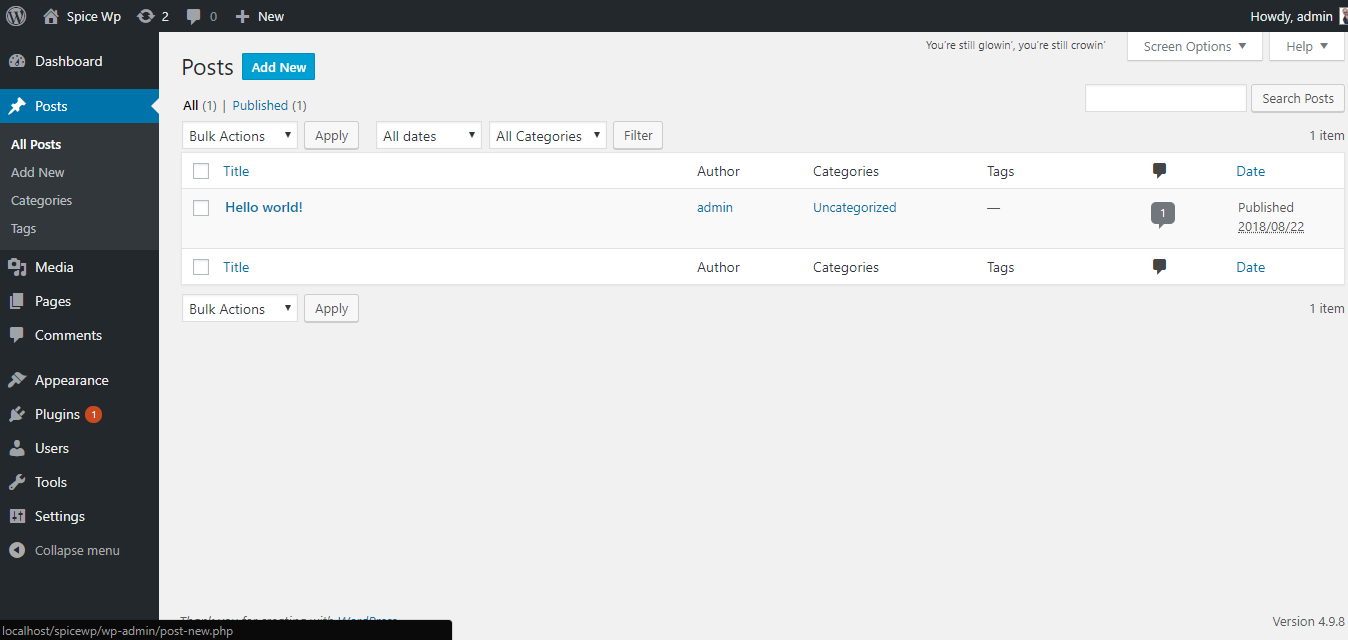
While at the All Posts Screen shown below, there is an Add New button at the top that when clicked on takes you to another screen to create a post.
Creating a Title
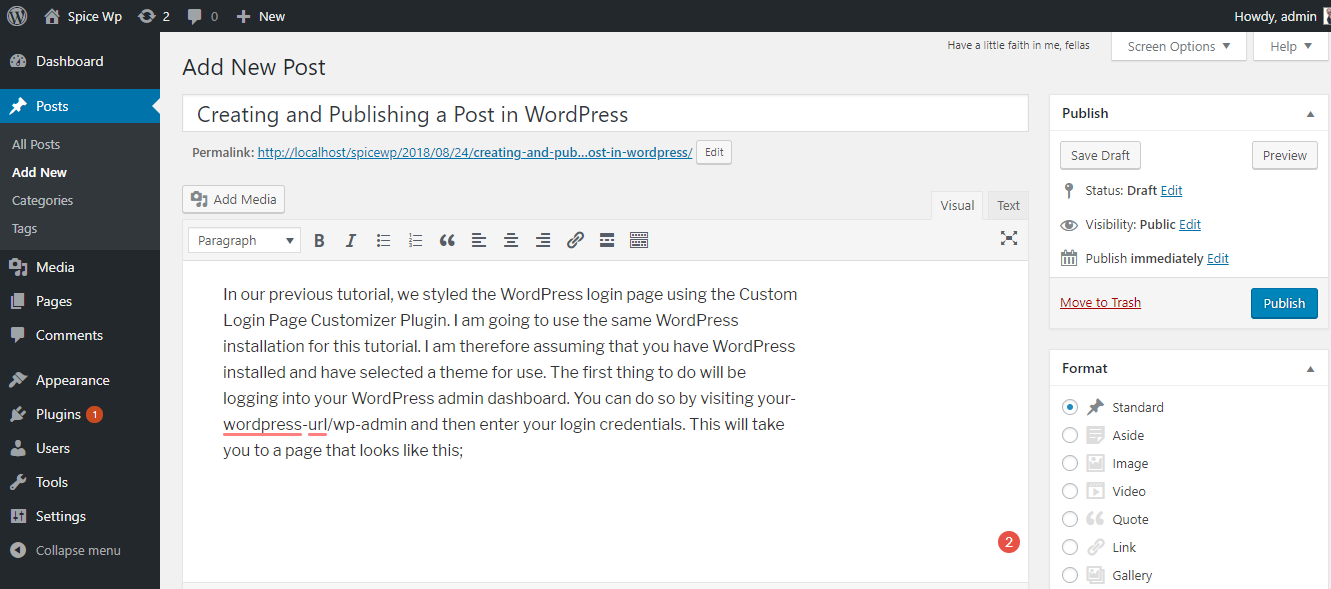
After using either of the methods above to create a new post, you will be taken to a screen titled Add New Post that looks like this;

Just below the heading Add New Post, there is a text field with placeholder text “Enter title here.” This is where we are going to enter the title for our post. My title is Creating and Publishing a Post in WordPress.

Creating a Post Body
Now that we have the title, we are going to create the body for our post. Below the title area, we have a large text area. This is where you can type all the content for your blog post. I am going to add some text to my post as shown below;
Editing the Permalink of the Post
WordPress created a permalink from the title that you assign to your post. In my case, my post has been assigned http://localhost/spicewp/2018/08/24/creating-and-publishing-a-post-in-wordpress/. Sometimes, you might want to change this permalink to match your preferences. You can see you permalink just below the title you created for your post. On the right hand side of the permalink, there is an Edit button that enables you to edit the permalink as shown on the screenshot below.

I am going to change my permalink to “create a post”. After making the change, click on the OK button next to the new permalink.

Adding a Feature Image
A feature image is used to represent the mood, contents and the theme of a post in WordPress. It is optional and is important in enhancing the presentation of your blog. To add a feature image to our blog, we are going to scroll down to the bottom right of the New Post screen where there is a Set feature image link under Feature Image.

Clicking on this link will take you to the media library where you can choose an image from those that have already being uploaded or upload a new image from your computer. After selecting the image to use as a feature image, click on the Set featured image button at the bottom right to save it.

Adding an Image inside Post Content
We added text content to our post above. Sometimes, you might want to add an image to better describe what your content is talking about. To do that, move the cursor to the exact point on the text content where you want to insert an image. In my case, I want to add an image after the paragraph. After that, click on the “Add Media” button just above the text content area.

This will take you to the media library (same screen as the above on setting featured image) where you can choose an image from those that have already been uploaded or upload a new image from your computer. Click on the Set featured image button at the bottom right to save it after choosing your image. The selected image will then be shown on your post content as shown below;

WordPress allows you to edit several aspects of an image when you add it to a post. Clicking on the image will give you options to edit its alignment and add a caption.

If you click on the pencil-like button that appears above the image, a window will pop up that allows you to add a caption, an alternate text, set the image alignment and size and replace the image. Click on Update at the bottom right to save your changes. I am going to add my caption and leave the others as they are;

Selecting a Category
When creating posts, you might want to categorize them into different categories. This is useful in allowing your visitors to easily see posts in the same category. While still at the New Post screen, navigate to the right hand side of the post. Here, under categories, you will see tabs for All Categories and Most Used.

Since this is our first post, we do not have any category apart from the default Uncategorized. We are therefore going to create a new category by clicking on the +Add New Category link. This opens a new text field just below the link where we can type the category name. Press enter when done.

Previewing a Post
After completing all the steps above, you might want to have a look at how your post looks like before publishing it. To do so, navigate to the top right of the screen under the Publish panel. Here, you will see a button named Preview as shown below;

Clicking on this button opens a preview of your post in a new tab. My post preview looks like this;

Publishing a Post
If you are satisfied with how your post looks like, you can then go ahead and publish it. Under the Publish panel on the screenshot above (post publish panel), click on the Publish button to publish your post.
Saving Post as Draft
You might run out of time and decide to complete creating your post at a later time. WordPress allows you to do that by saving your post as a draft. Under the Publish panel on the screenshot above (post publish panel), click on the Save Draft button to save your post as a draft.
Scheduling a Post
If you want to publish a post at a particular date and time, you can simply do that in WordPress. After creating your post, navigate to the Publish panel on the screenshot above (post publish panel) and click on the Edit link adjacent to Publish Immediately with a calendar icon. This will allow you to set a date and time when you would like to have the post published. Click on the OK button when done to save your changes.

Updating a Post
Now that we have published our post, we might spot an error or maybe want to change a few things. When we click on Posts on the left hand side menu on any screen, we are taken to this screen that shows a list of all of our posts.

If you move the cursor to the post that you would like to update, you get Edit, Quick Edit, Trash and View options popping up just below it as shown below;

Clicking on the Edit option will take you to the edit screen, which is similar to the new post screen. You can make your changes here then click on the publish button.
The Quick Edit option allows you to update the post’s title, slug, category, date, add a password or make the post private and change the status of the post to either Published, Pending Review or Draft. Click on the Update button to save your changes.

Unpublishing a Post
If you would like to unpublish a post, click on Posts on the left hand side menu on any screen to see a list of all of your posts. Move the cursor to the post that you would like to update and click on either Edit or Quick Edit. If you click on Edit, navigate to the right hand side of the edit screen to the Publish panel and then click on the Edit link adjacent to Status. This will allow you to select Draft from a pull down menu and then click Okay. Click on the Update button to save your changes.

If you clicked on Quick Edit, navigate to the status drop down menu on the quick edit options screenshot above and select Draft. Click on Update to save your changes.
To completely delete your post from WordPress, select the Trash option on the screenshot below.

Conclusion
After creating, publishing and updating my post, I can view it now. It takes me to this page where I can see the feature image at the top, the content, the permalink and the image I added to the content.

- How to add Categories in WordPress Media Library - February 4, 2020
- How to Redirect 404 page to the Home Page in WordPress - January 28, 2020
- How to Backup WordPress Website to DropBox - January 22, 2020
1 thought on “Beginners Guide to Creating and Publishing a Post in WordPress”